Here are a few words and some pictures I put together to help eliminate the confusion in setting your float level. Obtaining the correct float level is of the utmost importance as it can affect all jetting circuits.
THE FLOAT LEVEL IS THE FIRST STEP TO PROPERLY DIALING IN YOUR JETTING.
To help you understand what is going on inside your float bowl I’ll first explain the theory behind it. Contrary to popular belief engine intake vacuum alone is not strong enough to ingest the required amount of fuel needed for proper running, much less running at all. All engines require some sort of pressure to force fuel into the intake tract where it can mix with a metered volume of air prior to combustion. This pressure is obtained by the use of a venturi and the mechanics described by the Bernoulli Effect. The venturi is used to speed the airflow of the incoming intake charge which also happens to decrease the pressure present in the venturi. The pressure differential between the venturi and the float bowl has a natural tendency to try equalize, and it’s this pressure differential that is responsible for creating the ‘fuel pressure’ that is required for proper running.
The fuel system on most off-road and MX bikes makes use of a carburetor that is of the gravity feed variety. As it suggests you’re relying on the forces of gravity to pull fuel from the gas tank down to the carb and into the float bowl. Since your float bowl is vented, atmospheric pressure (14.7psi) is constantly acting on the predetermined volume, or weight, of fuel inside your float bowl. As air flows through the carb bore (venturi) a pressure drop is realized and the fuel in float bowl is ‘pressurized’ as the pressure between the float bowl and the carb bore (venturi) try to equalize. By altering the volume, or weight of fuel in the float bowl you’re basically varying the fuel pressure that is acting on your jets. More fuel in the float bowl will create more fuel pressure and result in rich(er) running conditions for a given set of jets.
Okay, enough theory, how do you do it? You’ll need to first start off by removing your carb. Be sure to clean the surrounding area to the best of your ability to avoid dirt and debris falling into your carb; or worse, your engine. After you’ve removed your carb I would suggest a thorough cleaning using carb cleaner (or equivalent) and compressed air to ensure that all jets and passageways are spotless. Avoid using wire or other tools to clean orifices of jets; it’s all too easy to alter their original designed dimensions.
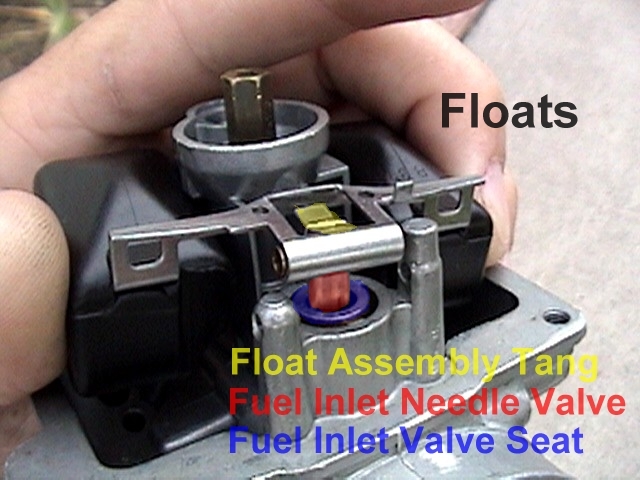
After your carb is clean you can now set your float level. The picture below will allow you to become familiar with the parts that are responsible for maintaining the correct float level in your carb. There are four basic parts, the floats themselves (part of the float assembly), the float assembly tang, the fuel inlet needle valve, and the fuel inlet valve seat.

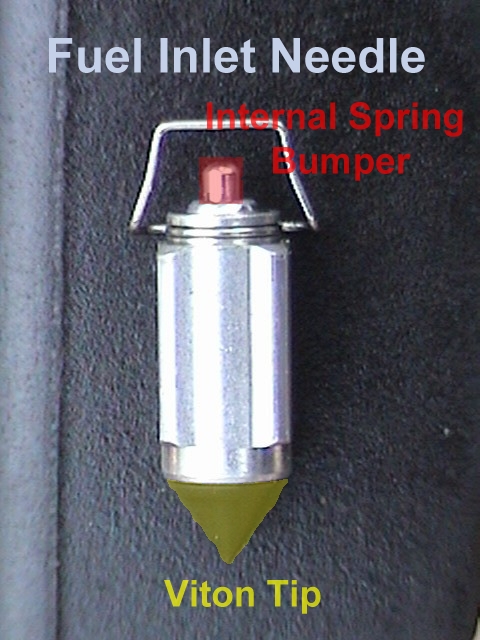
It is always a good idea to remove the float assembly pivot pin (already shown removed) and extract the float assembly and the fuel inlet needle. The fuel inlet needle is a wearable part and over time can deteriorate. A worn fuel inlet needle can contribute to an irregular float level. Most fuel inlet needles consist of an internal spring loaded bumper (which contacts the float assembly tang) and a plastic or Viton (rubber) tip. Inspect the fuel inlet needle tip for wear and/or damage. To give you an idea, Eric Gorr recommends replacing the fuel inlet needle/seat assembly every two years. I’ve found that the average cost is around $15 for both parts.
 (Fuel inlet needle shown with Viton (rubber) tip. The Viton is used to isolate the fuel inlet needle from vibration and to create a better seal against the fuel inlet valve seat.)
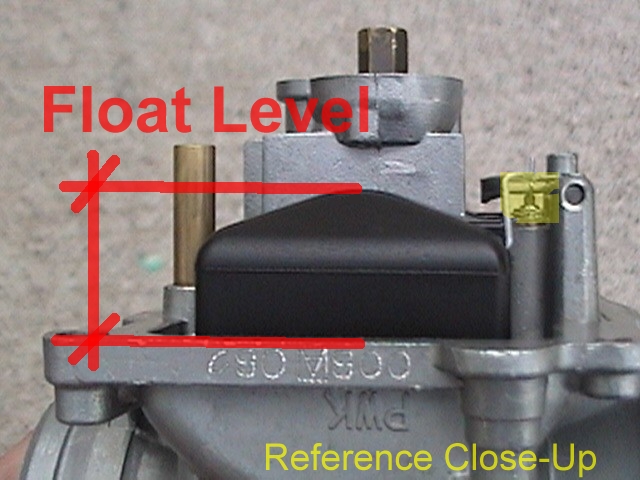
 Now that you’ve made sure you aren’t going to have any issues from worn parts you can reinstall your needle, float assembly and float assembly pivot pin and continue on to set your float level. The float level measurement is taken from the top of the floats (when the carb is positioned upside down) to the gasket surface of the float bowl as illustrated in the next picture. You can use an open-end wrench (sized per your spec), a small metric ruler, or a float level gauge. The tolerance for your float level is usually around +/- 0.50mm.

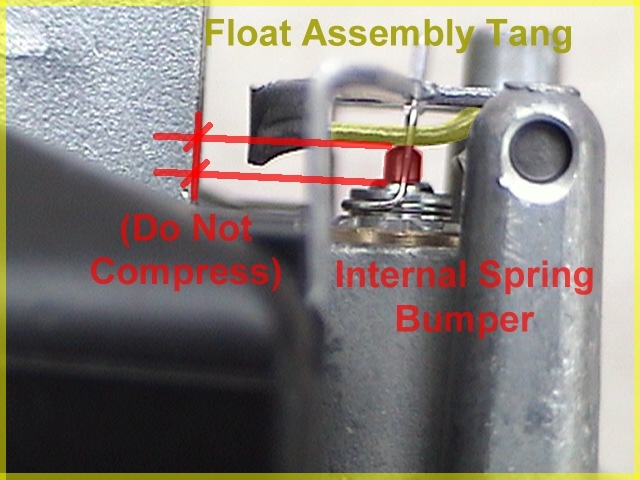
When setting the float level be aware that the spring loaded bumper on the fuel inlet needle valve may have a tendency to compress under the weight of the float assembly which will skew your measurement. Before you obtain your measurement you’ll need to make sure that the float assembly tang just barely makes contact with the spring-loaded bumper. Sometimes it is easier to hold the carb body at a 45-degree angle to avoid compressing the spring in the fuel inlet needle.

If you find that your measurement does not match your float level spec then you can carefully bend the float assembly tang to achieve your desired measurement. Be sure to recheck your work, and if you feel confident that your float level is spot on then you can reinstall your carb and get back to riding.


