TBolt USA is open and filling orders quicker than ever!
Email: contact@tboltusa.com
• Text
704-826-5887 • Request a Callback
Welcome to the TBoltUSA Tech Database! To visit our store, click here, or use the menus at the top of the page.

How To Install A Manual Clutch In Your XR / CRF 50
By
Dan Navarrete
(Also see Brian's video https://www.youtube.com/watch?v=eMv0ecUD8bI&t=148s)
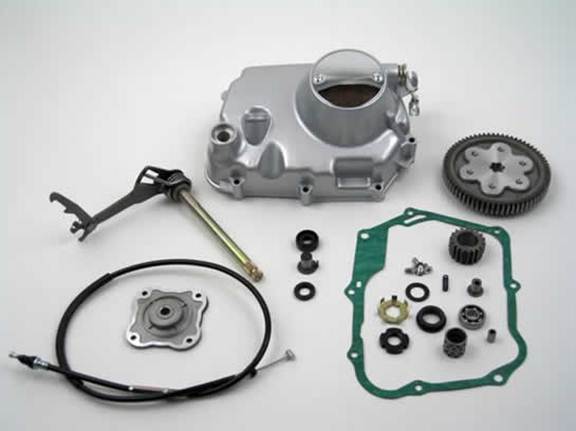
C1. One of the biggest performance upgrades you can make to your XR or CRF 50 is to replace the stock semi auto clutch with a fully manual clutch. By adding a manual clutch, you can expect your 50 to launch harder out of corners, and you can also expect to get a faster jump off the starting line. For this �How To� article, we opted to use the proven 3-plate manual clutch kit from Honda Trail Bikes. This kit comes with everything you need except for the clutch lever and perch. With a little time and patience, the Trail Bikes clutch is fairly easy to install and is well worth the effort.
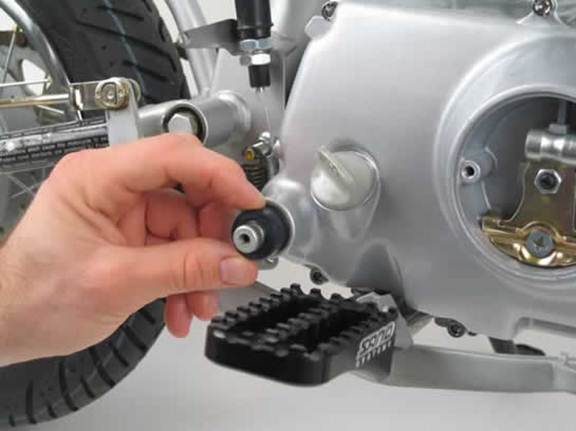
C2. To begin the process, drain the engine oil and remove the foot peg mount. Once the oil has been drained, use an 8mm socket to remove the clutch cover bolts and remove the cover.
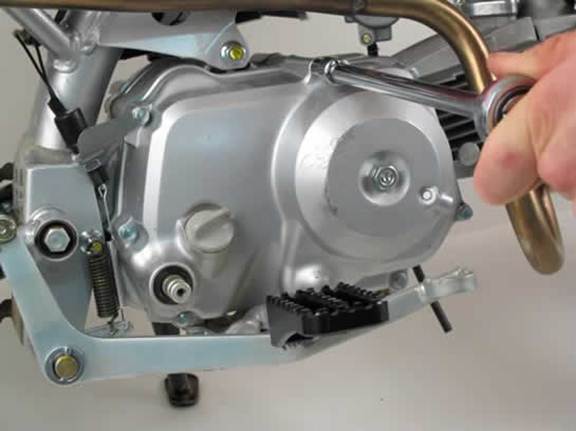
C3. Use a Phillips head screwdriver (or in impact driver) to remove the 4 screws from the outer clutch cover.
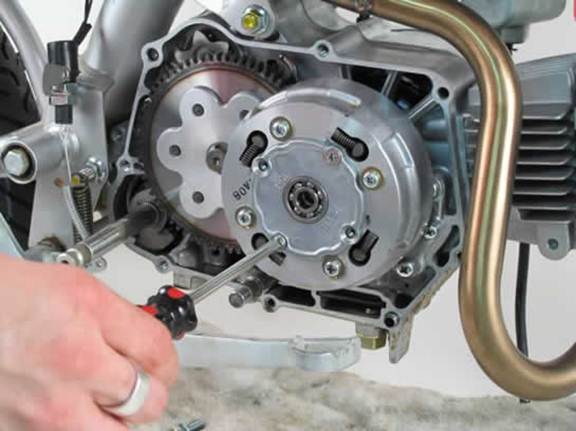
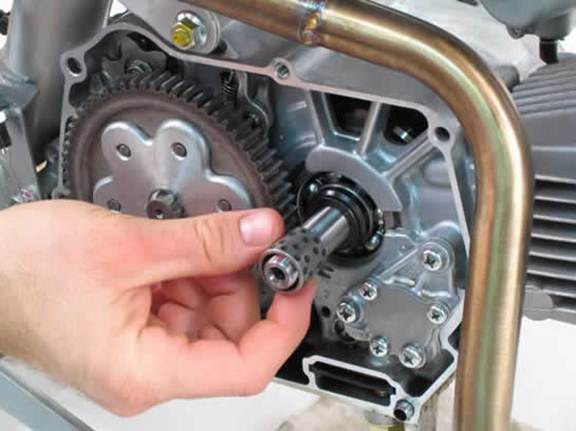
C4. Use a small flat blade screwdriver and open up the tabs on the lock washer. Use a clutch nut tool and a strap wrench to remove the black retaining nut. Remove the clutch assembly.
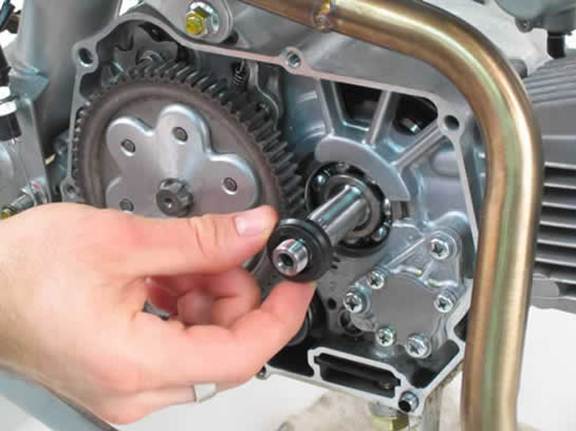
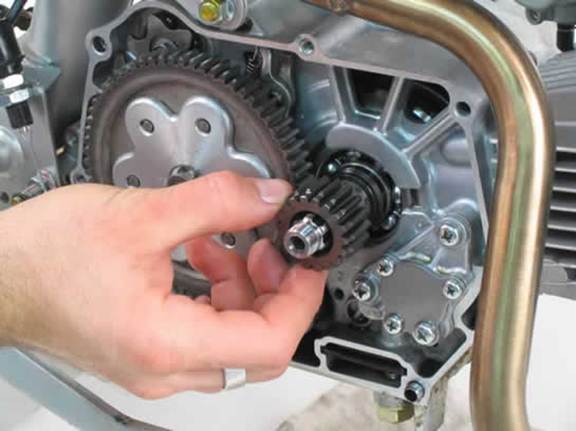
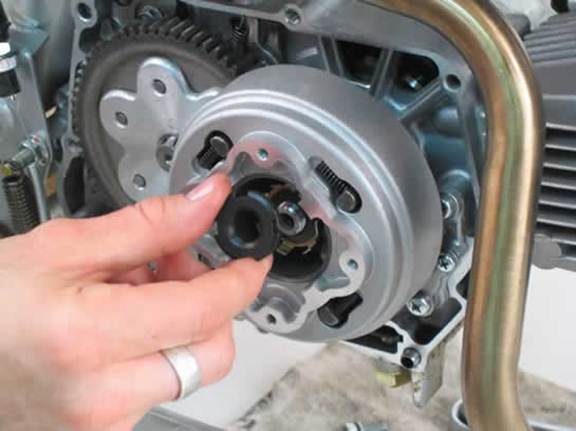
C5. Remove the primary drive gear.
C6. Remove the dimpled bushing.
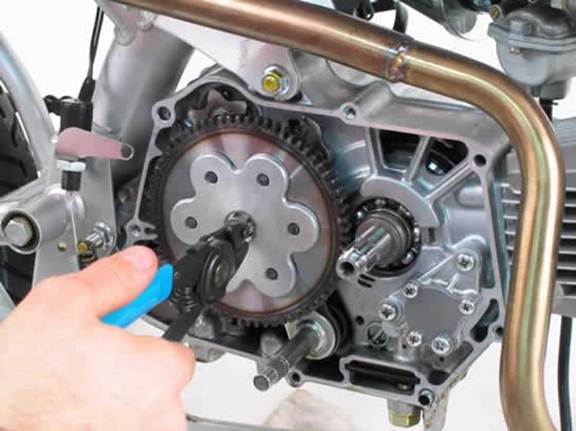
C7. Use snap ring pliers to carefully remove the snap ring. Remove the large driven gear.
C8. Remove the stepped collar.
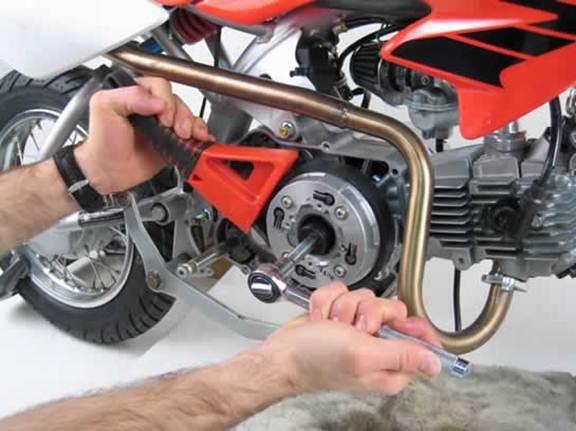
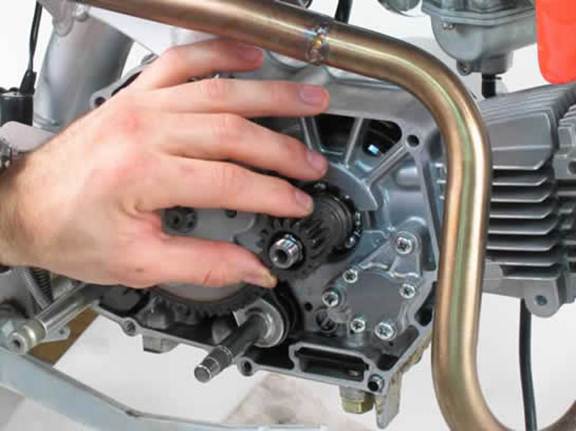
C9. Use a 10mm socket to remove the 2 bolts securing the stopper plate and stopper arm. Be sure to pay attention to how the stopper plate and stopper arm line up.
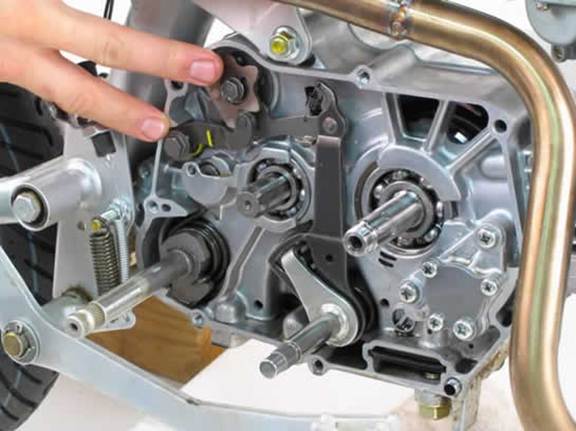
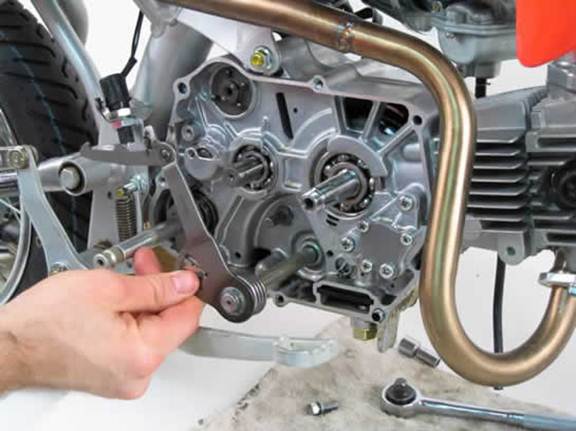
C10. Carefully remove the gearshift spindle assembly.
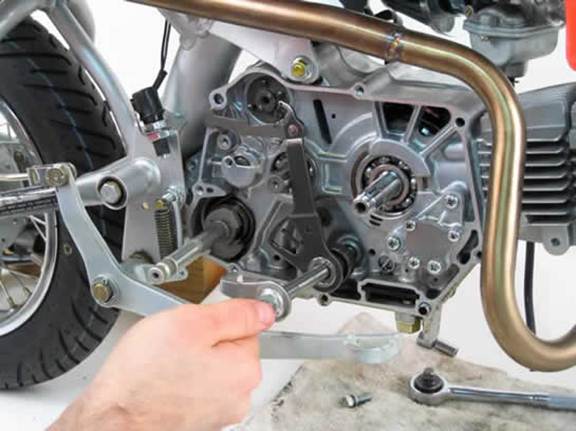
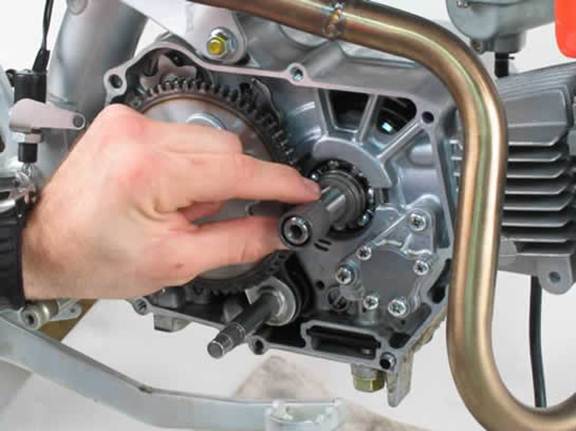
C11. Install the new gearshift spindle assembly. Be sure that the shift shaft seal on the left side of the bike remains in place while inserting the new gearshift spindle assembly.
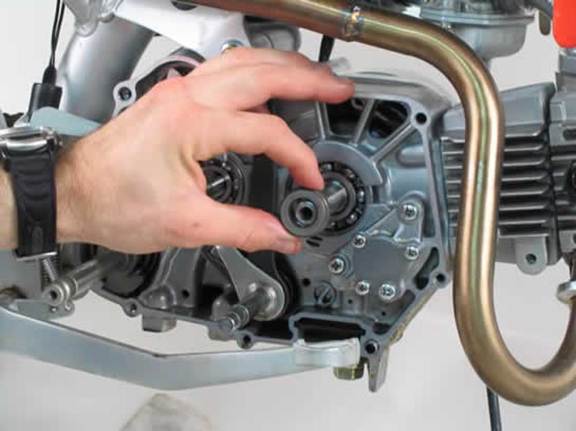
C12. Install the new large driven gear.

C13. Install the new stepped collar. The tapered portion of the collar should face away from the engine.
C14. Install the new dimpled bushing.
C15. Install the new primary drive gear.
C16. Install the new clutch assembly. Note that the backside of the clutch assembly locks onto the primary gear. Make sure that the clutch assembly is locked into place before proceeding. Install the new lock washer.
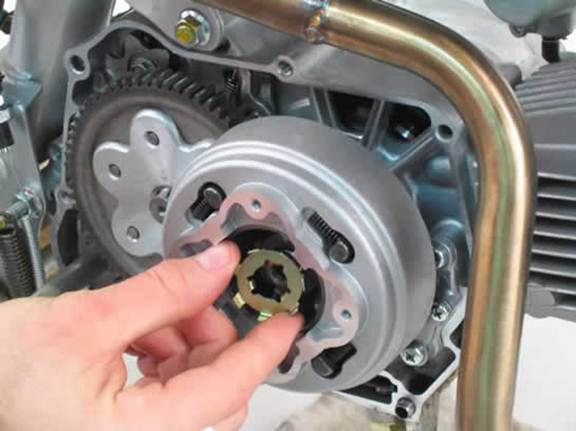
C17. Install the new cup washer. Make sure that the tapered end of the washer faces away from the engine.
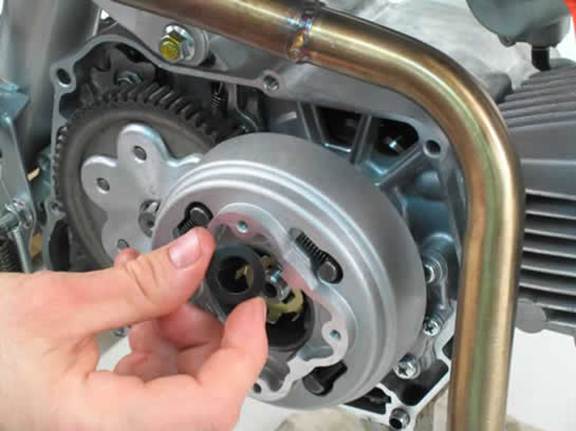
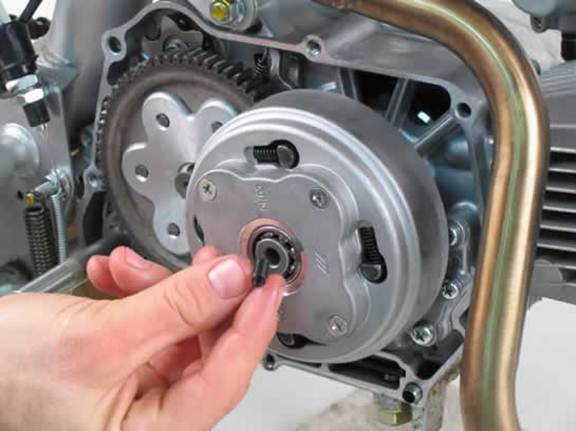
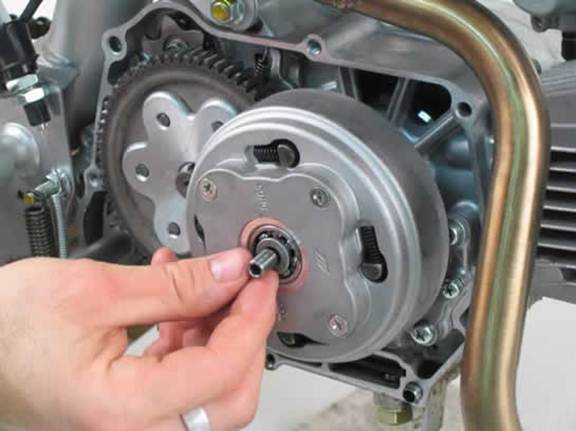
C18. Install the new retaining nut. Use a strap wrench and a clutch nut tool to tighten the retaining nut to 31 ft-lb. After the retaining nut has been tightened down, use a small flat blade screwdriver to bend the arms of the lock washer into place.
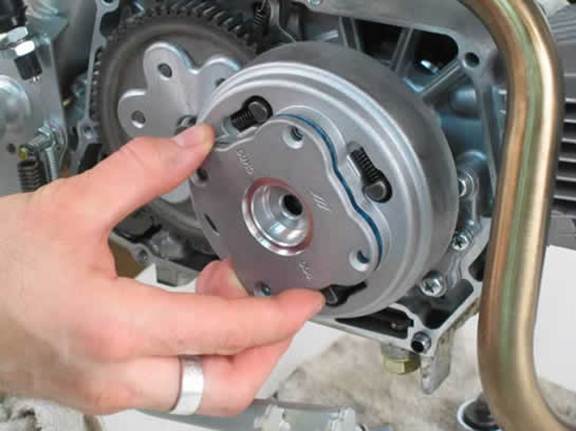
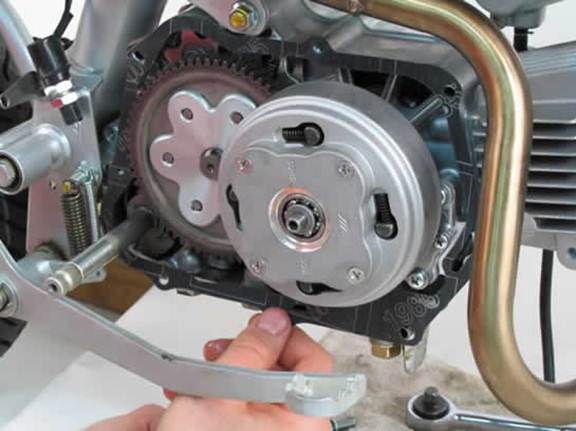
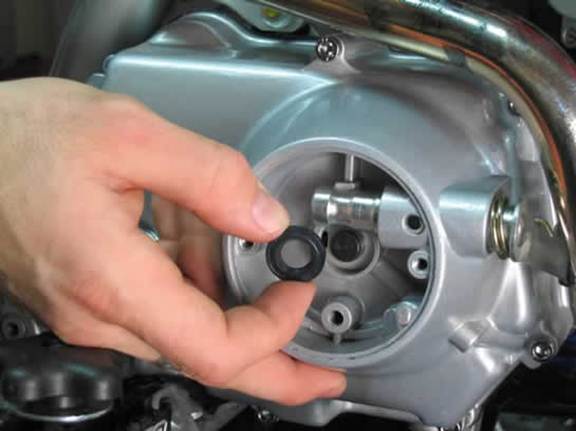
C19. Install the new outer cover.
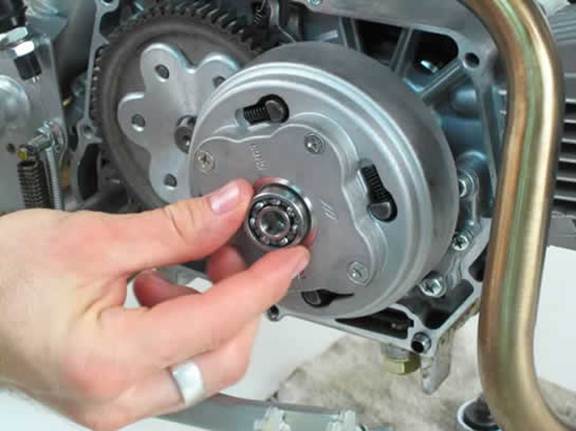
C20. Install the new bearing into the outer cover.
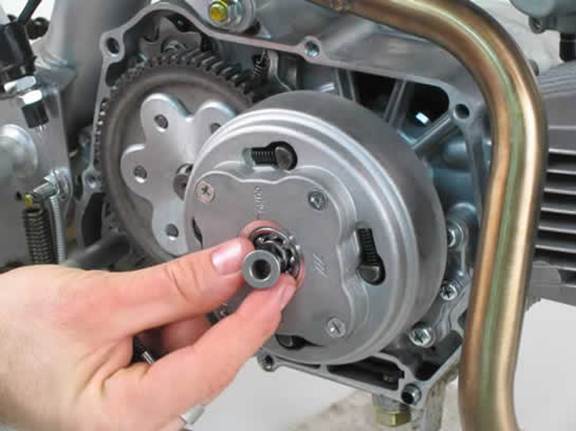
C21. Install the new oil passage bushing into the bearing.
C22. Install the new spring into the bushing.
C23. Install the new oil passage tube over the spring and into the bushing.
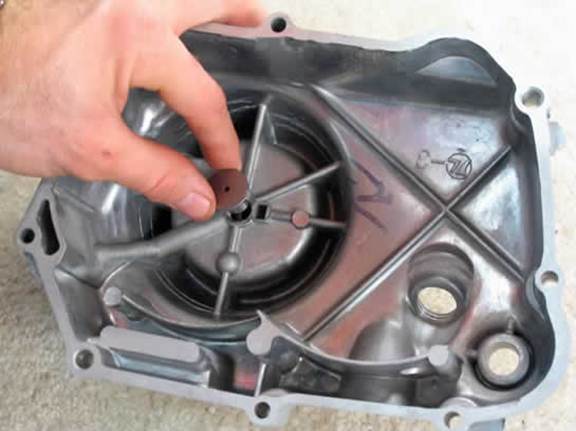
C24. Flip the new clutch cover over and insert the clutch actuator into place.
C25. Install the new clutch cover gasket over the two existing dowel pins to keep it in place.
C26. Install the new clutch cover into place and secure with the new Allen head bolts included in the kit.

C27. Install a new seal over the kick-start lever.
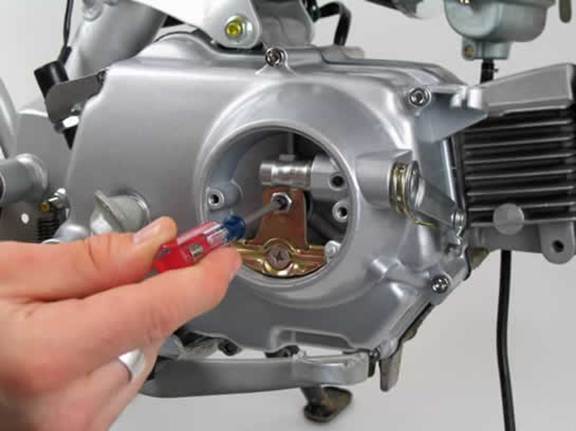
C28. Remove the chrome cover plate and remove the Phillips head bolt. Remove the clutch actuator plate assembly. Install the new oil seal. Make sure that the oil seal is completely seated. Replace the clutch actuator plate assembly.
C29. Loosen the locknut on the clutch adjuster screw. Tighten the screw until there is very little to no play in the clutch actuator plate. Connect the included clutch cable to the clutch arm and route the cable up to the clutch lever. Be sure that there is a small amount of play at the clutch lever. If not, loosen the clutch adjuster locknut and readjust the clutch adjuster screw.
C30. Install the chrome clutch cover and use your shirt to polish it to a mirror like finish. Take a step back and admire your new clutch set up as you are now done. Now get outside and learn how to ride 3rd gear wheelies.
