TBolt USA is open and filling orders quicker than ever!
Email: contact@tboltusa.com
• Text
704-826-5887 • Request a Callback
Welcome to the TBoltUSA Tech Database! To visit our store, click here, or use the menus at the top of the page.
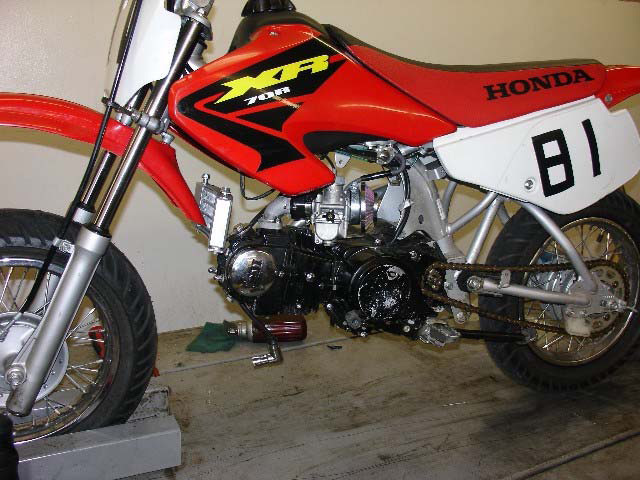
The Trail Bikes Oil Cooler Kit is a high quality accessory designed to help your Honda horizontal engine or Honda clone engine keep cooler. Air-cooled engines run hotter when modified or subjected to heavy loads such as racing use. This kit will help your engine’s durability and reliability by circulating the engine oil through a cooler reducing the engine’s oil temperature. It is highly recommend that you completely read through the installation instructions before you begin.
WARNING!!!
The installation of aftermarket accessories such as this oil cooler kit may void your manufacturer’s warranty. Trail Bikes is not responsible in any way for such voids.
WARNING!!!
This guide is for illustration purposes only. All engine work should be performed by a trained professional mechanic and in accordance to factory recommendations. Improper installation could result in extensive engine damage. Use this guide for reference only. Any and all instructions provided are suggestions for the professional mechanic.
Step 1. Remove oil cooler from box and examine the two mounting brackets included in the kit. The bracket attached to the cooler is made to slip over your cylinder studs as the illustration shows above.
The other bracket is designed to attach to the frame as the illustration shows below. The brackets provided in this kit are designed to work on multiple applications and you will need to determine what works best for your application. If you have the option to use either on your application, we recommend using the frame mounted bracket setup.
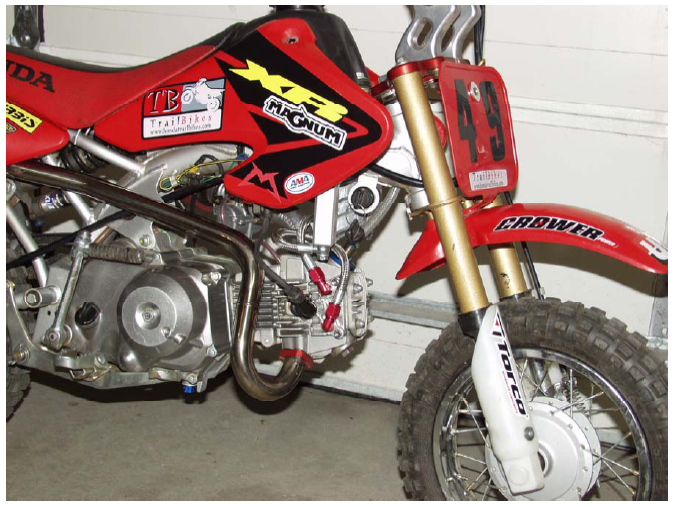
It is best to locate a spot on the bike that is towards the front of the bike where air will travel across the cooler as the bike is traveling forward. Once a good spot has been located, attach your mounting bracket of choice. Only hand tighten the cylinder studs or the hose clamp provided for the other mounting bracket. At this time you will “mock up” the installation and make sure that the oil cooler lines will be long enough to reach the cooler and that the lines will not have to make any extreme bends which would restrict oil flow. (Please note that the cooler can be installed upside down if necessary, the oil lines can be at the top or bottom of the cooler)
Turn the wheel lock to lock and compress the suspension fully making sure nothing will come in contact with the cooler or the lines.
If everything looks like it is going to clear, proceed to step 2.
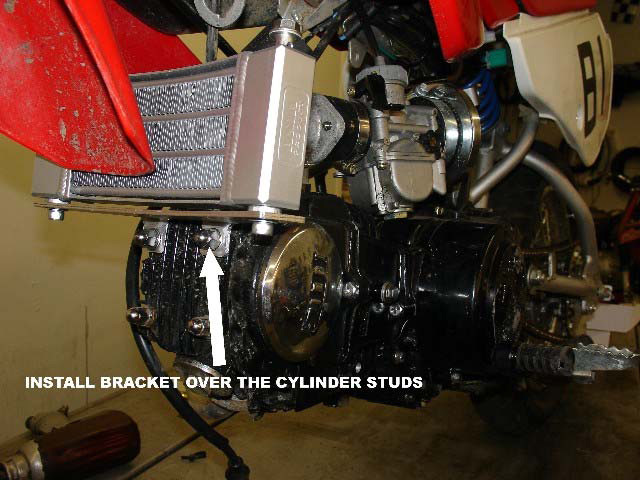
Step 2. Mount the oil cooler in the selected location using the mounting bracket of choice. The illustration above shows the cooler being mounted with the bracket that slips over the cylinder studs. Be sure to re-torque the cylinder studs to your manufactures specification if you choose this method. The torque rating is 8ft lbs for a factory Honda engine.
The illustration below shows the oil cooler mounted to the frame using the other bracket provided. This mounting bracket is attached to the frame using a hose clamp and is the better choice if it can be used on your application. For a stronger and more reliable mount you can also drill and tap a hole in the frame. The bracket has a clearance hole in it already. This would be the preferred mounting method if applicable.
Step 3. Remove the right hand side cylinder head cover (it is the one near the spark plug held in with 3 bolts) The center bolt runs all the way through the head to the other side, hold the cover on the opposite side when removing the long center bolt.
Once the head cover is removed, remove the old gasket and clean off any oil from the sealing surface on the head.
At this time select the new gasket from the two that are provided in the kit. You need to check the gasket against the head plate to see which one aligns with the holes and passages on your application.
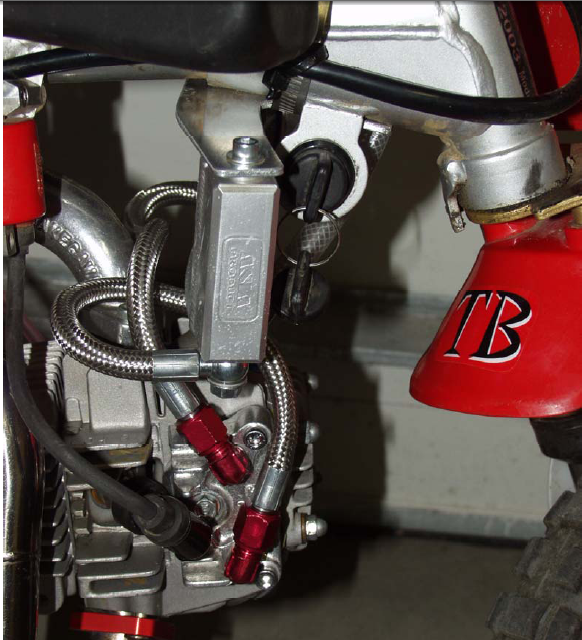
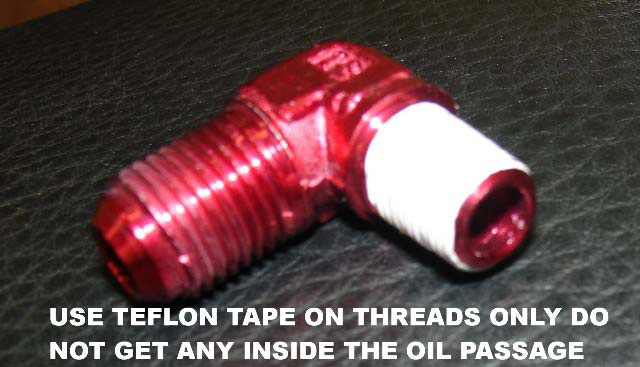
Next, prepare the oil cooler taps to be installed into the new head tap plate provided with the kit. You will need to use the Teflon tape provided in the kit on the threads to ensure an oil tight seal as the illustration shows below. It is not necessary to use Teflon tape on the compression fitting side of the taps. Make sure when wrapping the threads with the Teflon tape that you are applying the tape in the same direction as the taps would thread into the new 5 head tap plate. The tape should cover the threads of the taps but it must not cover the end where oil will flows through.
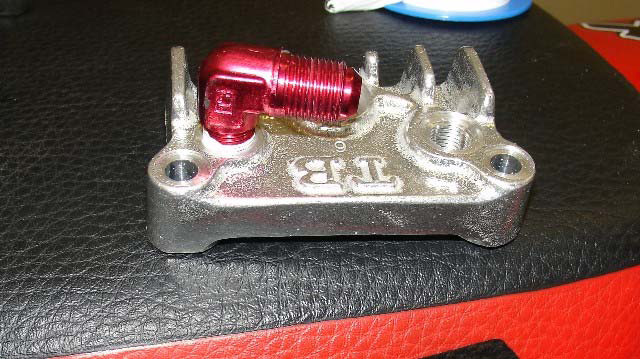
Prepare the new oil cooler head tap plate to replace the right hand side cylinder head cover by installing the oil cooler taps. Pay close attention to the angle you have installed the taps to ensure they are facing in the direction that you selected when “mocking up” the install in Step 1. Be sure not to over tighten the taps. Make sure that the taps are in such a position that when attaching the oil cooler line that the lines clear the cooling fins on the new head tap plate. Minor adjustments of the taps can be made once everything is in position.
Step 4. Ensure that all sealing surfaces are clean and apply the gasket of choice. Install the head tap plate on the engine and torque the bolts to manufactures specification. The torque rating is 8ft lbs for a factory Honda engine. Once the head tap plate has been installed, proceed to step 5.
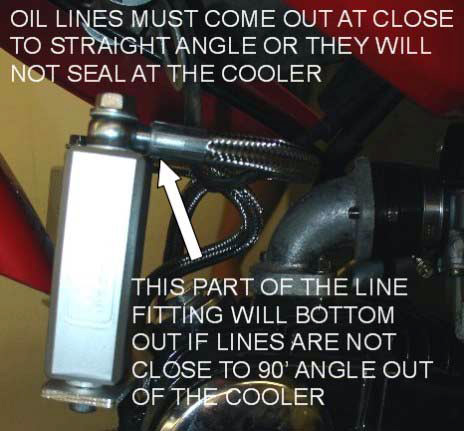
Step 5. Route oil lines to the oil cooler and head tap plate. At this time only hand tighten the lines and determine what the best routing for your application will be. You may have to make minor adjustment to the taps to achieve the best routing for you application. It is crucial to ensure that there is no severe bends in the oil lines that could restrict oil flow. The lines must attach to the cooler at a nearly perpendicular angle (90’ angle) or else the banjo fittings will not form a seal. If not installed at a perpendicular angle the end of the line will bottom out on the cooler and not the sealing surface for the banjo fitting. Once you have determined the correct routing for your application then tighten all connections.
Step 6. Check over complete installation to ensure that all lines are routed without severe bends and that all connections are tight. Turn the wheel lock to lock and compress the suspension fully making sure nothing will come in contact with the cooler or the lines. Check the oil dipstick to make sure the oil level is full. You are now ready to start your engine.
Start the engine for a few seconds (10 seconds or so) and inspect all connections for any signs of leakage. Shut the engine off after the 10 second interval. Oil pressure should have built up and some of the oil should now be in the cooler causing your crankcase to be low on oil. If it does not appear that the oil level has decreased any there may be an oil flow problem and severe damage could occur if engine is restarted. Recheck all connections and installation if the oil level in the crankcase is not dropping. If the oil level lowered by a few ounces add the necessary oil to bring the crankcase oil level back to full. Once the oil level is back to full and you have made sure that there are no leaks, start the engine and allow it to run for a little longer and then shut off the motor and verify oil level again. Do this a few times until the oil level stays consistent, resulting in the correct level for the new increased oil capacity with the addition of the new Trail Bikes oil cooler.
Step 7. Recheck all oil connections, mounting bracket of choice, cylinder studs should be retorque if you chose this mounting method, re-torque cylinder head cover and check for oil leaks once again. If everything looks good, proceed to start the engine again. After the engine has warmed up you should be able to feel some warmth by touching the oil cooler. At this time rev the engine up a few times and ensure that there are no oil leaks again and again.
If the installation was performed correctly the cooler will provide very reliable service, extend the life of your engine and increase the performance on long or heavy-duty runs that generate a lot of horsepower robbing heat.
IMPORTANT NOTE
If you would like to verify that the installation is correct and that the oil is flowing as it should (highly recommended when installed on non OEM Honda engines such as the popular Chinese produced replicas) please take the following steps.
You will need to check for oil flow and pressure in some critical areas of the engine. First check for oil flow through the cooler. The easiest way is to crack loose the fittings on the cooler, check one at a time and shield the oil from hitting you with a rag as the oil can just squirt out (do this at your own risk) If there is oil pressure escaping at each end of the cooler then you can be certain that the flow to and through the cooler is good.
Next you want to make sure that the cam is getting oil to it with the new cylinder head cover (this is particularly important to check on Chinese replica engines with the “short” cam as the boss on the Trailbikes cylinder head cover does not extend as far as the factory Chinese cylinder head cover) You can remove the top cylinder head cover and look for a large amount of oil on the camshaft lobes and rocker arm area. You can also remove the cylinder head valve caps and see if oil squirts out of the rocker studs (once again, perform this check at your own risk as hot oil will squirt out under pressure if everything is installed correctly) Recheck the oil level as you are sure to lose some performing these checks and then start enjoying your bike again knowing that the power won’t drop off as much after you ran that motor hard like it did when it was just air cooled.
Install guide by Mike at Trail Bikes, one of the leading supporters and innovators of the sport!